
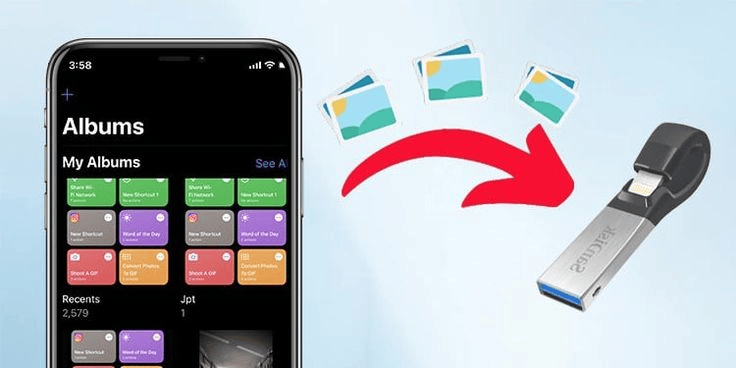
How to Transfer Photos from iPhone to Computer with USB
Transferring photos from your iPhone to a computer using a USB cable is a straightforward process. Here’s a step-by-step guide:
Requirements:
- iPhone with a USB cable.
- A computer (Windows PC or Mac).
- The latest version of iTunes (for Windows) or Finder (for Mac).
Steps:
- Connect your iPhone to your computer: Use a USB cable to connect your iPhone to a USB port on your computer.
- Unlock your iPhone: If your iPhone is locked, unlock it with your passcode or using Face ID/Touch ID.
- Trust this computer: When you connect your iPhone to your computer for the first time, a pop-up message may appear on your iPhone asking if you trust this computer. Tap “Trust” to proceed. Read about How to Get Rid of No SIM on iPhone
- Open iTunes or Finder:
- For Windows: Open iTunes if you have it installed. If not, you can download it from the official Apple website.
- For Mac: Open Finder.
- Locate your iPhone: In iTunes or Finder, you should see your iPhone listed in the left sidebar or as a device icon on the desktop.
- Access your iPhone’s photos:
- In iTunes (Windows): Click on the device icon in the top left corner, then click “Photos” in the left sidebar.
- In Finder (Mac): Click on your iPhone’s name under “Locations” in the Finder sidebar, then click “Photos” in the Finder window.
- Choose the photos to transfer:
- In iTunes (Windows): Check the “Sync Photos” box and select the photo albums or folders you want to transfer.
- In Finder (Mac): You can simply drag and drop photos or folders from your iPhone to your computer.
- Start the transfer:
- In iTunes (Windows): Click the “Apply” button in the bottom right corner to start the transfer.
- In Finder (Mac): Drag the selected photos or folders to the desired location on your computer.
- Wait for the transfer to complete: The time it takes to transfer photos depends on the number and size of the files. Once it’s done, you’ll have a copy of your iPhone photos on your computer.
- Eject your iPhone: Safely disconnect your iPhone from the computer by clicking the eject button in iTunes (Windows) or dragging the iPhone icon to the trash in Finder (Mac).
It is a valuable skill that can free up storage space on your device while ensuring your cherished memories are safely backed up. Here are Some More Dept analyses.
Gather Your Materials
Before you begin, make sure you have the following items ready:
- Your iPhone
- A USB cable compatible with your iPhone
- Your computer (Windows PC or Mac)
Also read the Article: Why Does Phone Say SOS Only Investigating Issues
Prepare Your iPhone
Ensure your iPhone is unlocked and awake. This will make the transfer process smoother.
Connect Your iPhone to Your Computer
Connect one end of the USB cable to your iPhone’s charging port and the other end to an available USB port on your computer.
Trust This Computer
A message may appear on your iPhone asking if you trust this computer. Tap “Trust” to proceed.

Access Your iPhone’s Photos
Your computer should recognize your iPhone as a storage device. Open the “File Explorer” on Windows or “Finder” on Mac and look for your iPhone listed as a device.
Select Photos for Transfer
Navigate to the “DCIM” folder on your iPhone, where your photos are stored. Select the photos you want to transfer to your computer.
Choose a Destination Folder
Create a folder on your computer where you want to save the transferred photos. Select this folder as the destination for your photos.
Start the Transfer
Drag and drop the selected photos from your iPhone’s folder to the destination folder on your computer.
Monitor the Progress
You can monitor the transfer progress in your computer’s file transfer window. The time it takes depends on the number and size of the photos.
Safely Disconnect Your iPhone
Once the transfer is complete, safely disconnect your iPhone from the computer by ejecting it from the file explorer or finder.
Verify the Transfer
Open the destination folder on your computer to ensure that all selected photos have been successfully transferred.
Organize Your Transferred Photos
Take this opportunity to organize your photos on your computer by creating albums or folders for easy access in the future.
Additional Tips for Efficient Photo Transfer
While you now know how to transfer photos from your iPhone to your computer with a USB cable, here are a few additional tips to make the process even more efficient:
- Regular Backups: Make transferring photos a regular habit to ensure your memories are consistently backed up.
- Delete Unwanted Photos: Before transferring, take the opportunity to delete any unnecessary photos and videos from your iPhone to save storage space.
- Use Photo Management Software: Consider using photo management software like Apple’s Photos or Adobe Lightroom to organize and edit your transferred photos.
- Backup Your Computer: Don’t forget to regularly back up your computer to keep your transferred photos safe in case of hardware failures.
Explore Wireless Transfer Options
While using a USB cable is a reliable method, wireless transfer options have become increasingly popular. how to transfer photos from iPhone to computer with USB Apple’s AirDrop allows you to transfer photos and videos between your iPhone and Mac effortlessly. Similarly, cloud storage services like iCloud, Google Photos, and Dropbox offer seamless synchronization, making it convenient to access your photos across devices.
Advanced Editing and Organization
Once your photos are safely transferred to your computer, take advantage of advanced editing tools and organizational features. Use photo editing software to enhance your pictures, apply filters, and crop or adjust colors. Create folders and albums to categorize your photos by events, dates, or themes, making them easier to locate in the future.
Conclusion
Transferring photos from your iPhone to your computer with a USB cable is a simple and effective way to manage your digital memories. How to transfer photos from iphone to a computer with USB By following the steps outlined in this guide, you can ensure that your photos are safe, organized, and easily accessible whenever you need them.
FAQs
.Is it necessary to use a USB cable for transferring photos?
While using a USB cable is one of the most reliable methods, you can also transfer photos wirelessly using cloud services or apps like AirDrop.
.Can I transfer both photos and videos using this method?
Yes, you can transfer both photos and videos from your iPhone to your computer using the same method.
.What if my computer doesn’t recognize my iPhone?
If your computer doesn’t recognize your iPhone, try using a different USB port, restarting both devices or updating your computer’s operating system.
.Are there any risks involved in this process?
Transferring photos using a USB cable is a safe and straightforward process. However, ensure your computer and iPhone are protected with updated security software.
. Can I transfer photos from my computer back to my iPhone?
Yes, you can transfer photos from your computer back to your iPhone using iTunes or third-party apps.